
Intex Hot Tub Owners Manual: A Comprehensive Guide
Welcome! This manual provides essential guidance for safe operation, maintenance, and enjoyment of your new Intex hot tub, ensuring years of relaxation.
Congratulations on purchasing your Intex hot tub! You’ve invested in a fantastic way to relax and rejuvenate, right in the comfort of your own home. This inflatable spa offers a convenient and affordable alternative to traditional hot tubs, without compromising on features or enjoyment.

Before you dive in, it’s crucial to familiarize yourself with this owner’s manual. It contains vital information regarding setup, operation, maintenance, and safety precautions. Taking the time to read through it thoroughly will ensure a long-lasting and trouble-free experience with your new hot tub.
This guide is designed to be user-friendly, with clear instructions and helpful tips. We’ll cover everything from unboxing and initial setup to water chemistry, troubleshooting, and winterizing. Remember, proper care and maintenance are key to maximizing the lifespan and performance of your Intex hot tub. Enjoy!
Unboxing and Initial Setup
Carefully unpack your Intex hot tub and all its components. Inspect for any visible damage that may have occurred during shipping. Report any issues to the retailer immediately. Lay out all parts and compare them to the package contents checklist (found in the next section) to ensure everything is present.
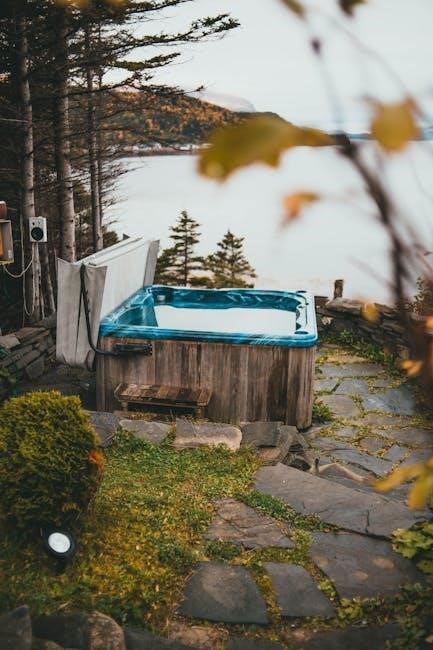
Choose a suitable location for your hot tub – a flat, level surface is essential. Avoid placing it on concrete or asphalt directly, as this can damage the tub’s liner. A protective mat is highly recommended. Ensure the location is within reach of a grounded electrical outlet and has adequate drainage.
Before inflating, clear the area of any sharp objects. Once inflated, avoid dragging the tub, as this could cause punctures. Follow the specific inflation instructions provided with your model. Proper setup is crucial for safe and enjoyable use.
Package Contents Checklist
Verify the presence of all listed items before proceeding with setup. Your Intex hot tub package should include: the inflatable hot tub itself, an insulated cover to retain heat and prevent debris accumulation, a filter pump with hoses and connections for water circulation and heating, and at least one filter cartridge for maintaining water cleanliness.
Additionally, check for a repair patch kit for minor punctures, an owner’s manual (you’re reading it!), and potentially chemical starter kits containing pH and alkalinity adjusters. Some models may also include headrests or cup holders. Carefully review the included documentation to confirm the specific contents for your particular Intex hot tub model.
If any items are missing or damaged, contact Intex customer support or your retailer immediately for replacements. Do not attempt to operate the hot tub without all necessary components;
Site Preparation & Leveling
Choosing the right location is crucial for your Intex hot tub’s longevity and your enjoyment. Select a completely flat, stable surface capable of supporting the filled weight of the tub – this is substantial! Avoid placing the hot tub on concrete slabs prone to cracking, or soft ground that may settle unevenly.
A six-foot diameter clear space around the tub is recommended for access and maintenance. Protect the base with a protective ground cloth or old carpeting to prevent punctures. Leveling is paramount; use a spirit level to ensure the tub is perfectly horizontal. Even a slight incline can strain the pump and affect water circulation.
Small adjustments can be made with shims placed under the base. Remember, a level foundation ensures optimal performance and prevents premature wear and tear.
Installing the Filter System
Proper filter system installation is vital for maintaining clean and healthy hot tub water. Begin by carefully unpacking all filter system components, verifying everything is present according to your package contents list. The filter pump should be positioned on a level surface, protected from direct rainfall, but with adequate ventilation.
Ensure the pump’s intake and outlet connections are free from debris. Connecting the hoses requires careful alignment and secure tightening of the hose clamps – avoid over-tightening, which can damage the fittings. The filter housing will attach directly to the pump, ensuring a watertight seal.
Before powering on, double-check all connections for leaks. A properly installed filter system is the cornerstone of a hygienic and enjoyable hot tub experience.
Filter Pump Connection

Connecting the filter pump to your Intex hot tub involves attaching the inlet and outlet hoses securely. First, identify the inlet (usually marked) – this draws water from the tub; The outlet hose returns the filtered water to the tub. Ensure both hoses are the correct length to avoid strain on the pump or connections.
Apply a small amount of silicone-based lubricant to the hose cuffs for easier attachment and a better seal. Push the hoses firmly onto the pump’s fittings, then tighten the provided hose clamps using a screwdriver – snug is sufficient; avoid over-tightening.
Inspect the connections carefully for any gaps or leaks before proceeding. A secure connection prevents water loss and ensures optimal filtration performance. Double-check everything!
Filter Cartridge Installation & Maintenance
Installing the filter cartridge is straightforward. Open the filter housing, typically by twisting the cap. Place the clean filter cartridge inside, ensuring it’s seated correctly within the housing. Secure the cap tightly, following the manufacturer’s markings – hand-tighten plus a quarter turn is usually sufficient.
Regular maintenance is crucial for optimal performance. Rinse the cartridge with a garden hose (using a nozzle for better cleaning) every 2-4 weeks, removing debris. Avoid using harsh chemicals or high-pressure washers, as these can damage the filter media.
Replace the cartridge every 3-6 months, or sooner if it becomes discolored or clogged, even after cleaning. A clean filter ensures clear, healthy water!
Filling and Starting Your Hot Tub
Before filling, ensure the drain plug is securely tightened. Use a garden hose to fill the hot tub, avoiding direct impact on the liner. Fill to approximately 2 inches below the maximum water level indicated inside the tub. Do not overfill!
Once filled, plug in the control panel and power on the system. The heater will automatically begin to warm the water, but this may take several hours depending on the ambient temperature. Avoid using the hot tub while the water is heating.
Initial startup requires careful monitoring. Test the water chemistry before the first use and adjust as needed. Allow the water to circulate for at least 30 minutes before entering.
Water Level Guidelines

Maintaining the correct water level is crucial for optimal performance and longevity of your Intex hot tub. The ideal water level should fall between the minimum and maximum fill lines marked on the interior wall of the spa.
Never operate the hot tub with the water level below the filter intake, as this can cause the pump to run dry and potentially damage it. Similarly, avoid overfilling, as water may spill during use and potentially damage surrounding areas or electrical components.
Regularly check the water level, especially after use, as water is lost through splashing and evaporation. Adjust as needed to ensure it remains within the recommended range for a consistently enjoyable experience.
Initial Startup Procedure
Before your first soak, a careful startup is essential. Once the hot tub is filled to the correct level and the filter is installed, connect the power supply. The control panel will illuminate, initiating the system check.
Allow the system to prime itself – this may take a few minutes. You might hear the pump running and air being purged from the lines. Do not activate the heater immediately. First, check for any leaks around the connections and ensure the jets are functioning correctly.
After confirming everything is operating as expected, you can begin to set the desired temperature. Remember that initial heating will take several hours, depending on the ambient temperature and tub size.
Understanding the Control Panel
Your Intex hot tub’s control panel is the central hub for managing all functions. Familiarize yourself with its layout for optimal use. Typically, you’ll find buttons for power, temperature adjustment (up and down arrows), and jet control.
Many models feature a digital display showing the current water temperature and selected settings. Some panels also include buttons for activating energy-saving modes or programming timers. Pay close attention to any indicator lights, as they provide crucial information about the system’s status.
Understanding the symbols and functions of each button will ensure you can easily customize your hot tub experience and maintain safe operation. Refer to the detailed diagrams in this manual for specific button locations and functions.
Power Button & Safety Features
The power button initiates and terminates all hot tub operations. A single press typically activates the system, while a subsequent press shuts it down. Crucially, most Intex hot tubs incorporate several safety features linked to the power system.
These include automatic shut-off mechanisms triggered by overheating or excessively high temperatures, preventing potential damage or hazards. Some models also feature a low-water level sensor that disables the heater to protect the pump. Always ensure the power cord is properly grounded and connected to a dedicated circuit.
Never operate the hot tub with a damaged power cord or if the control panel displays an error message. Prioritize safety by regularly inspecting the power connection and adhering to all electrical guidelines outlined in this manual.
Temperature Control Settings
Your Intex hot tub’s control panel allows precise temperature adjustments for personalized comfort. Typically, temperature is controlled using dedicated up and down arrow buttons. The display will show the current water temperature and the set point. Most models allow heating up to a maximum of 104°F (40°C).
It’s recommended to start with a lower temperature and gradually increase it to your preference. Avoid setting excessively high temperatures, as this can strain the heater and potentially pose a safety risk. Consider the needs of all users, especially children or individuals sensitive to heat.
Some models offer programmable timers, allowing you to pre-set temperatures for specific times of day. Refer to your model’s specific instructions for detailed information on utilizing these advanced features.
Jet Control Operation
The jet system in your Intex hot tub provides a soothing massage experience. Operation is usually controlled via buttons on the control panel, often labeled “Jets” or with a jet icon. These buttons typically cycle through different jet speed settings – low, medium, and high – or may offer a dedicated on/off function.
Experiment with the various settings to find your preferred level of intensity. Lower speeds are ideal for gentle relaxation, while higher speeds provide a more vigorous massage. Be mindful of the noise level at higher speeds. Some models feature directional jets, allowing you to customize the massage focus.
Prolonged use of high-speed jets can increase energy consumption. Consider using them intermittently to balance comfort and efficiency. Always ensure jets are clear of obstructions for optimal performance.
Water Chemistry & Maintenance
Maintaining proper water chemistry is crucial for a safe and enjoyable hot tub experience. Regularly testing and balancing the water prevents corrosion, scaling, and the growth of bacteria. Key parameters include pH, total alkalinity, and calcium hardness. Ideal pH levels should be between 7.2 and 7.8.
Total alkalinity acts as a pH stabilizer, ideally maintained between 80-120 ppm. Calcium hardness prevents corrosion and scaling, with a target range of 150-250 ppm. Sanitization is essential to kill bacteria. Chlorine and bromine are common options, alongside alternative sanitizers.
Consistent monitoring and adjustments, alongside regular shocking, will ensure crystal-clear and healthy water; Always follow product instructions carefully and prioritize water safety.
Testing Water Balance (pH, Alkalinity, Calcium Hardness)
Regular water testing is paramount for maintaining a healthy hot tub environment. Use a reliable test kit or strips to measure pH, total alkalinity, and calcium hardness at least twice weekly, and more frequently with heavy use. pH should be between 7.2 and 7.8; low pH is acidic and can corrode equipment, while high pH reduces sanitizer effectiveness.
Total alkalinity, ideally 80-120 ppm, buffers pH changes. Calcium hardness, between 150-250 ppm, prevents corrosion or scaling. Accurate testing ensures proper chemical balance. Follow the test kit instructions precisely, noting the color changes and comparing them to the provided chart.
Record your results to track trends and make informed adjustments. Consistent testing prevents problems before they arise, ensuring a safe and enjoyable soaking experience.
Sanitizing Your Hot Tub (Chlorine, Bromine, Alternatives)
Maintaining proper sanitation is crucial for eliminating bacteria and ensuring water safety. Three primary sanitizers are available: chlorine, bromine, and alternative systems. Chlorine is cost-effective but can have a strong odor and may irritate skin. Bromine is gentler and more stable at higher temperatures, making it popular for hot tubs.
Alternative systems, like mineral cartridges or ozone generators, reduce reliance on traditional chemicals. Regardless of your choice, follow the manufacturer’s instructions carefully for dosage and application. Regularly test sanitizer levels – ideally 1-3 ppm for chlorine and 3-5 ppm for bromine – and adjust accordingly.
Shocking the water weekly (or after heavy use) helps oxidize contaminants and reactivate the sanitizer. Always prioritize water safety and hygiene for a pleasant experience.
Shocking the Water
Shocking your Intex hot tub involves adding a higher-than-normal dose of sanitizer – typically a non-chlorine shock – to oxidize organic contaminants like sweat, lotions, and oils. This process doesn’t just sanitize; it “breaks down” combined chloramines, which cause odor and irritation. Perform shocking weekly, or immediately after periods of heavy use, such as after a party.
Follow the shock product’s instructions precisely, as dosages vary. Generally, you’ll add the shock in the evening, with the jets running, and keep the hot tub cover off overnight to allow for proper oxidation. Wait at least 15-30 minutes before re-entering the water after shocking, ensuring sanitizer levels return to a safe range (1-3 ppm for chlorine, 3-5 ppm for bromine).
Regular Maintenance Schedule
Consistent maintenance is crucial for a clean, safe, and enjoyable hot tub experience. This schedule outlines key tasks to keep your Intex hot tub in optimal condition. Daily checks include visually inspecting the water for clarity and debris, and verifying the control panel functions correctly. Weekly procedures involve testing and balancing water chemistry, cleaning the waterline with a soft cloth, and wiping down the hot tub’s exterior.
Monthly tasks require a more thorough approach: cleaning or replacing the filter cartridge, inspecting the jets for blockages, and a comprehensive water test. Adhering to this schedule prevents algae growth, scale buildup, and extends the lifespan of your hot tub and its components, ensuring years of relaxing soaks.
Daily Checks & Adjustments
Begin each day with a quick visual inspection of your Intex hot tub’s water. Look for any noticeable cloudiness, discoloration, or floating debris. Ensure the water level remains within the recommended range, adding water if necessary. Briefly check the control panel to confirm the heater and jets are functioning as expected, and that the set temperature is maintained.
Small adjustments can prevent larger issues. If you notice any unusual noises from the pump, investigate immediately. Skim the surface with a net to remove any leaves or insects. A daily routine of these simple checks will contribute significantly to maintaining clean, clear water and preventing potential problems, maximizing your hot tub enjoyment.
Weekly Cleaning Procedures
Dedicate time each week for a more thorough cleaning. Begin by testing and balancing the water chemistry – pH, alkalinity, and sanitizer levels. Then, use a hot tub brush to scrub the sides and bottom of the tub, paying attention to areas prone to buildup. Remove the filter and rinse it thoroughly with a garden hose, using a filter cleaning nozzle for best results.
Wipe down the hot tub’s exterior surfaces with a mild detergent and water. Inspect the jets for any blockages and clean them as needed. Finally, add a hot tub surface cleaner to help remove oils and lotions. Consistent weekly cleaning prevents algae growth and maintains optimal water quality, ensuring a hygienic and enjoyable soaking experience.
Monthly Filter Cleaning & Inspection
Beyond weekly rinsing, your filter requires a deep clean monthly. Remove the filter cartridge and soak it overnight in a filter cleaning solution specifically designed for hot tubs. This removes embedded oils, minerals, and debris that rinsing alone can’t eliminate. After soaking, rinse the filter thoroughly with a garden hose, ensuring all traces of the cleaning solution are gone.
Inspect the filter for any signs of damage – tears, cracks, or worn-out pleats. A damaged filter reduces efficiency and can allow debris to enter the system. If damage is found, replace the filter cartridge immediately. A clean and well-maintained filter is crucial for optimal water circulation and clarity, extending the life of your hot tub’s components.
Troubleshooting Common Issues
Encountering problems? This section addresses frequent issues. Low water flow often indicates a clogged filter – check and clean or replace it. Insufficient water levels can also cause this. If the heater isn’t working, verify the unit is powered on and the temperature is set correctly. Check the GFCI breaker; a tripped breaker will halt heating.
Error codes displayed on the control panel signal specific problems. Consult the error code list in this manual to identify the issue and recommended solution. Common codes relate to water temperature sensors, flow sensors, or heater malfunctions. If you cannot resolve the issue, contact Intex customer support for assistance – do not attempt repairs yourself.
Low Water Flow Problems
Reduced jet pressure or slow circulation? Several factors can cause low water flow. The most common culprit is a clogged filter cartridge; Remove and thoroughly clean the filter, or replace it if cleaning doesn’t restore flow. Ensure the water level is sufficiently high; the pump needs enough water to operate efficiently. Inspect the intake strainer inside the hot tub for debris blockage.
Also, check for kinks or obstructions in the hoses connecting the pump and jets. Air bubbles in the system can also mimic low flow; try briefly turning the pump off and on to purge any trapped air. If the problem persists after these checks, the pump itself may be failing and require professional attention.

Heater Not Working
Is your Intex hot tub failing to heat up? First, verify the control panel is set to the desired temperature and that the heater function is activated. Confirm the hot tub has sufficient power – check the GFCI outlet and breaker. A low water level can prevent the heater from operating as a safety precaution; ensure the water is within the recommended range.
The heater itself may have a thermal fuse that has tripped due to overheating. This usually requires professional replacement. Inspect the heater housing for any visible damage. If the control panel displays an error code related to the heater, consult the error code section of this manual. If none of these steps resolve the issue, contact a qualified technician for assistance.
Error Codes & Their Meanings
Decoding your Intex hot tub’s error messages is crucial for quick troubleshooting. “E01” typically indicates a low water level – immediately add water to the recommended fill line. “E02” signals a heater error; check the heater connections and ensure proper voltage. “E03” often means the water temperature sensor is malfunctioning and may require replacement.
“E04” suggests a flow rate error, potentially due to a clogged filter or pump issue. “E05” points to a temperature sensor error, similar to E03. Refer to the control panel display for the specific code. Always power cycle the hot tub after addressing the issue. If the error persists, consult a qualified technician or Intex customer support for further assistance and detailed diagnostics.

Winterizing Your Intex Hot Tub
Proper winterization protects your hot tub from freezing damage during colder months. Begin by completely draining the hot tub, including the pump, heater, and all plumbing lines. Use a wet/dry vacuum to remove any remaining water. Thoroughly clean the interior with a specialized hot tub cleaner to prevent algae growth.
Disconnect all electrical connections and store the control panel indoors. Remove and clean the filter cartridge, storing it in a dry place. Consider using a winterizing plug to seal the jets and prevent water from re-entering. Cover the hot tub with a durable winter cover, securing it tightly. Store the pump and heater indoors if possible, protecting them from freezing temperatures and moisture.
Draining and Cleaning Before Storage
Thorough draining is crucial to prevent freeze damage. Begin by switching off the power and disconnecting all electrical connections. Locate the drain valve – typically near the bottom of the hot tub – and attach a garden hose. Direct the hose to a suitable drainage area, away from plants and structures. Allow the tub to drain completely; this may take several hours.
Once drained, use a wet/dry vacuum to remove any remaining water from the jets, plumbing, and the bottom of the tub. Clean the interior surface with a dedicated hot tub cleaner, scrubbing gently to remove any dirt or debris. Rinse thoroughly and allow to air dry completely before covering. This prevents mold and mildew growth during storage.
Protecting the Equipment from Freezing
Freezing temperatures can severely damage your Intex hot tub’s components. After draining and cleaning, disconnect the filter pump, heater, and all hoses. Bring these items indoors to a dry, heated location for storage. If indoor storage isn’t possible, thoroughly drain all water from the pump and heater housing, and wrap them with insulating materials like blankets or foam.

Pay close attention to the plumbing lines. Any remaining water within these lines can expand when frozen, causing cracks and leaks. Consider using a plumbing air compressor to blow out any residual water. Store the hot tub cover indoors to prevent it from becoming brittle and cracked due to cold exposure. Proper preparation ensures a trouble-free start next season.
Safety Precautions
Your safety is paramount when enjoying your Intex hot tub. Always ensure the electrical outlet is GFCI protected and located a safe distance from the tub. Never operate the hot tub with damaged cords or plugs. Keep the area around the hot tub clean and dry to prevent slips and falls.
Strict supervision is crucial, especially when children or pets are present. Never leave children unattended near the hot tub, even for a moment. Individuals with medical conditions, pregnant women, and those taking medications should consult their doctor before using the hot tub. Avoid using the hot tub while under the influence of alcohol or drugs. Adhering to these precautions will help ensure a safe and enjoyable experience.
Electrical Safety Guidelines
Prioritize electrical safety when installing and operating your Intex hot tub. The hot tub must be connected to a dedicated Ground Fault Circuit Interrupter (GFCI) protected circuit. Do not use extension cords; a direct connection is essential. Regularly inspect the power cord for any damage – cracks, fraying, or exposed wires – and replace it immediately if found.

Never attempt to repair the electrical components yourself. Contact a qualified electrician for any electrical issues. Ensure the hot tub is properly grounded. Avoid operating the hot tub during thunderstorms or when the surrounding area is wet. Keep electrical components dry and protected from the elements. Following these guidelines minimizes the risk of electrical shock and ensures safe operation.
Supervision of Children & Pets
Constant and vigilant supervision is crucial when children or pets are near the hot tub. The high water temperature poses a significant risk of burns and drowning, even in shallow water. Never leave children unattended, even for a moment. Install a secure and compliant safety cover and always use it when the hot tub is not in use.

Teach children about the dangers of the hot tub and establish clear safety rules. Pets should also be supervised to prevent accidental immersion. Be aware that pets can become quickly fatigued in hot water. Consider barriers or fencing around the hot tub area to restrict unsupervised access. Prioritizing safety protects both children and pets from potential harm.